Create an extension
With the Appmaker partner dashboard, you can create extensions for your apps. This can be acheived in a few simple steps.
Step 1 - Navigate to the Home page of the partner dashboard
To create an extension,navigate to the Appmaker partner dashboard.
Once logged in, you will be taken to the homepage of the partner dashboard.
Step 2 - Create an extension
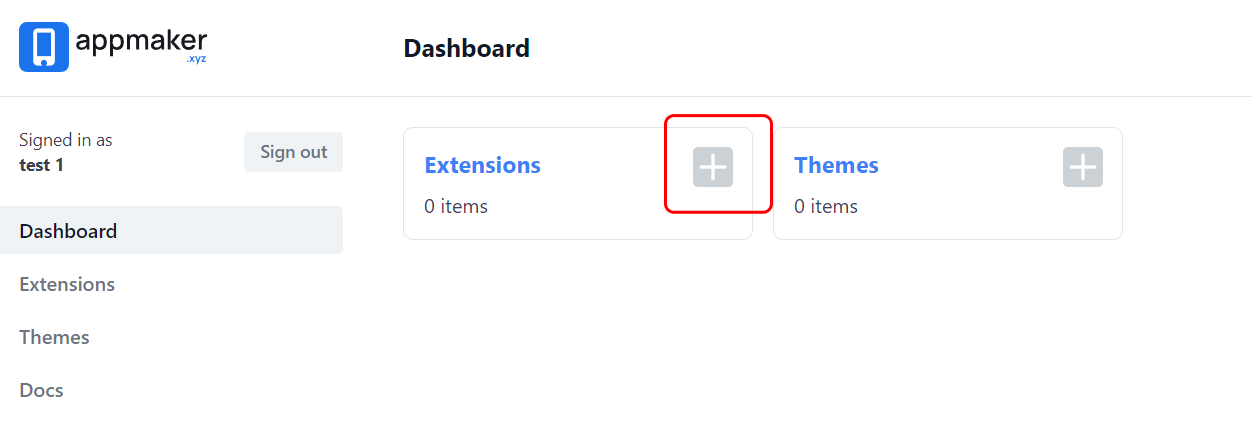
Click on "+" icon against the "Extension" card to create a new extension as shown in the screenshot below.
Step 3 - Name your extension
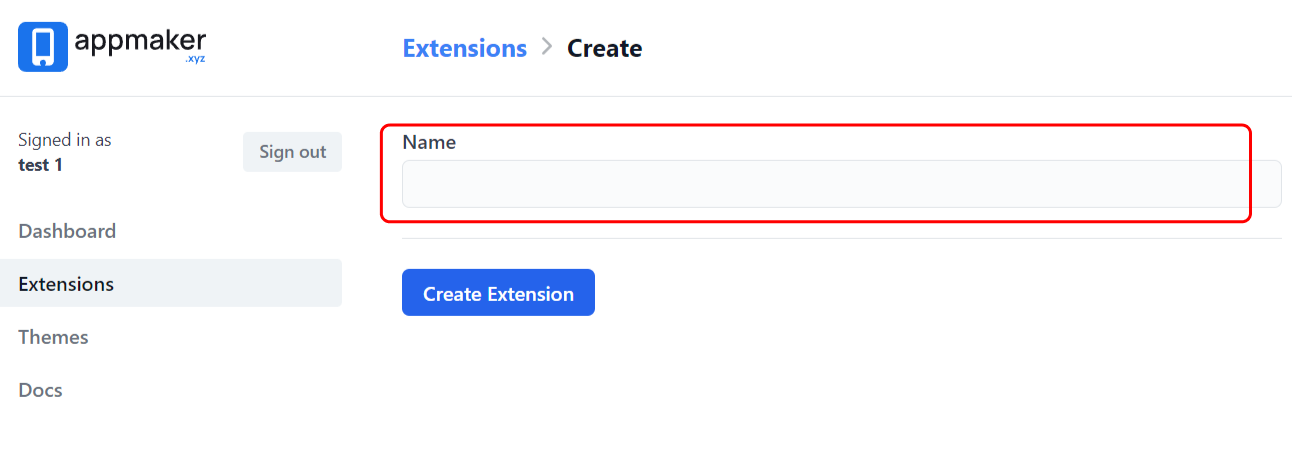
In the following screen enter a name for your extension in the input field and click on "Create extension" button as shown in the screenshot below.
Step 4 - Configure your extension
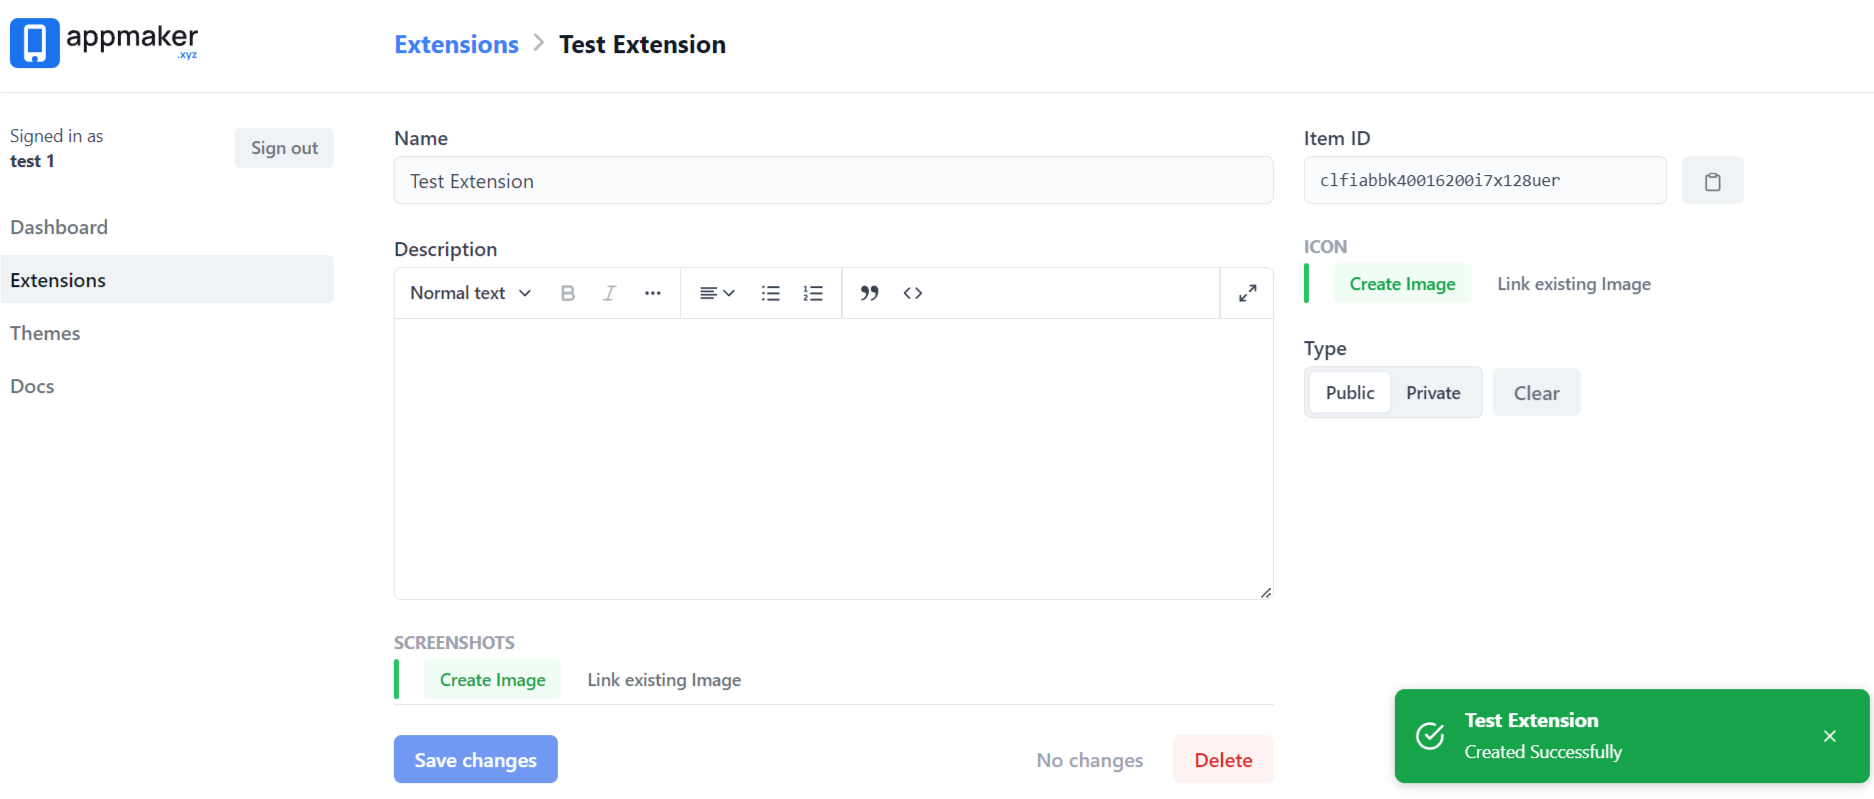
In the following screen, you can configure your extension. You can add the following details:
Name- Enter the name of your extension.Description- Enter a description for your extension.Icon- Upload an icon for your extension. You can upload an image under "create image" and add an icon via URL using the "Link existing image" option.Screenshots- Upload screenshots for your extension. You can upload an image under "create image" and add an icon via URL using the "Link existing image" option.type- Select the type of extension you want to create. You can select from the following options:Public- The extension will be visibile inside the appmaker extension library for everyone to access.Private- The extension will not be visibile inside the appmaker extension library for everyone to access.
configandsettings schema- Enter the configuration and settings schema for your extension.
Step 5 - Save your extension.
Click on save changes to save your extension.