Injecting Blocks in Pages using inapp-page-data-response
The inapp-page-data-response filter is a core Appmaker capability that allows developers to intercept and modify the JSON data for any page before it is rendered. This is extremely useful for injecting custom blocks, moving existing ones, or modifying page-level attributes like header visibility.
1. Prerequisites
Before using this filter, ensure you are working within an Appmaker theme or extension. Typical file locations:
- Filter Registration:
src/index.js(inside theactivatefunction) - Block Definitions:
src/blocks/ - Block Registration:
src/blocks/index.js
2. Core Concepts
The Filter Hook
When the app requests data for a page, it passes through this filter. You can modify the data object and must return it.
import { appmaker } from '@appmaker-xyz/core';

appmaker.addFilter(
  'inapp-page-data-response',
  'your-unique-id', // Unique string for this filter
  (data, { pageId }) => {
    // console.log('Current Page ID:', pageId); // Useful for debugging
    return data;
  }
);
Important Fields
clientId: A unique string (e.g.,my-custom-banner-1) used by React to track the component. Always provide a unique clientId to prevent duplicate renders or state issues.name: The registered name of your block (e.g.,custom/my-block).
3. Implementation Steps
Step A: Define your Custom Block
Create your component and export it.
// src/blocks/MyBlock.js
import React from 'react';
import { View, Text, StyleSheet } from 'react-native';

const MyBlock = ({ attributes }) => (
  <View style={styles.container}>
    <View style={styles.accent} />
    <View style={styles.content}>
      <Text style={styles.overline}>EXCLUSIVE</Text>
      <Text style={styles.title}>{attributes.title}</Text>
      <Text style={styles.description}>Premium dynamic content injection.</Text>
    </View>
  </View>
);

const styles = StyleSheet.create({
  container: { backgroundColor: '#fff', borderRadius: 12, flexDirection: 'row', elevation: 5 },
  accent: { width: 5, backgroundColor: '#000' },
  content: { padding: 16 },
  overline: { fontSize: 10, color: '#999' },
  title: { fontSize: 18, fontWeight: 'bold' },
});

export default MyBlock;
Step B: Register the Block
Add your block to the theme's block list so Appmaker recognizes the name.
// src/blocks/index.js
import MyBlock from './MyBlock';

export const blocks = [
  {
    name: 'custom/my-block',
    View: MyBlock,
  },
];
Step C: Inject via activate()
In your theme's main entry point, use the filter to inject the block into specific common pages (e.g., home, productList, productDetail).
// src/index.js
export function activate(params) {
  appmaker.addFilter(
    'inapp-page-data-response',
    'theme-block-injection',
    (data, { pageId }) => {
      // 1. Target a common system page
      if (pageId === 'productList' || pageId === 'home') {
        data.blocks = data.blocks || [];

        // 2. Prevent duplicate injection (IMPORTANT)
        const isBlockAdded = data.blocks.some(
          (block) => block.clientId === 'plp-top-banner',
        );

        if (!isBlockAdded) {
          // 3. Inject at specific index (e.g., 0 for top)
          data.blocks.splice(0, 0, {
            name: 'custom/my-block',
            clientId: 'plp-top-banner',
            attributes: { title: 'Flash Sale: 50% Off!' },
          });
        }
      }
      return data;
    },
  );
}
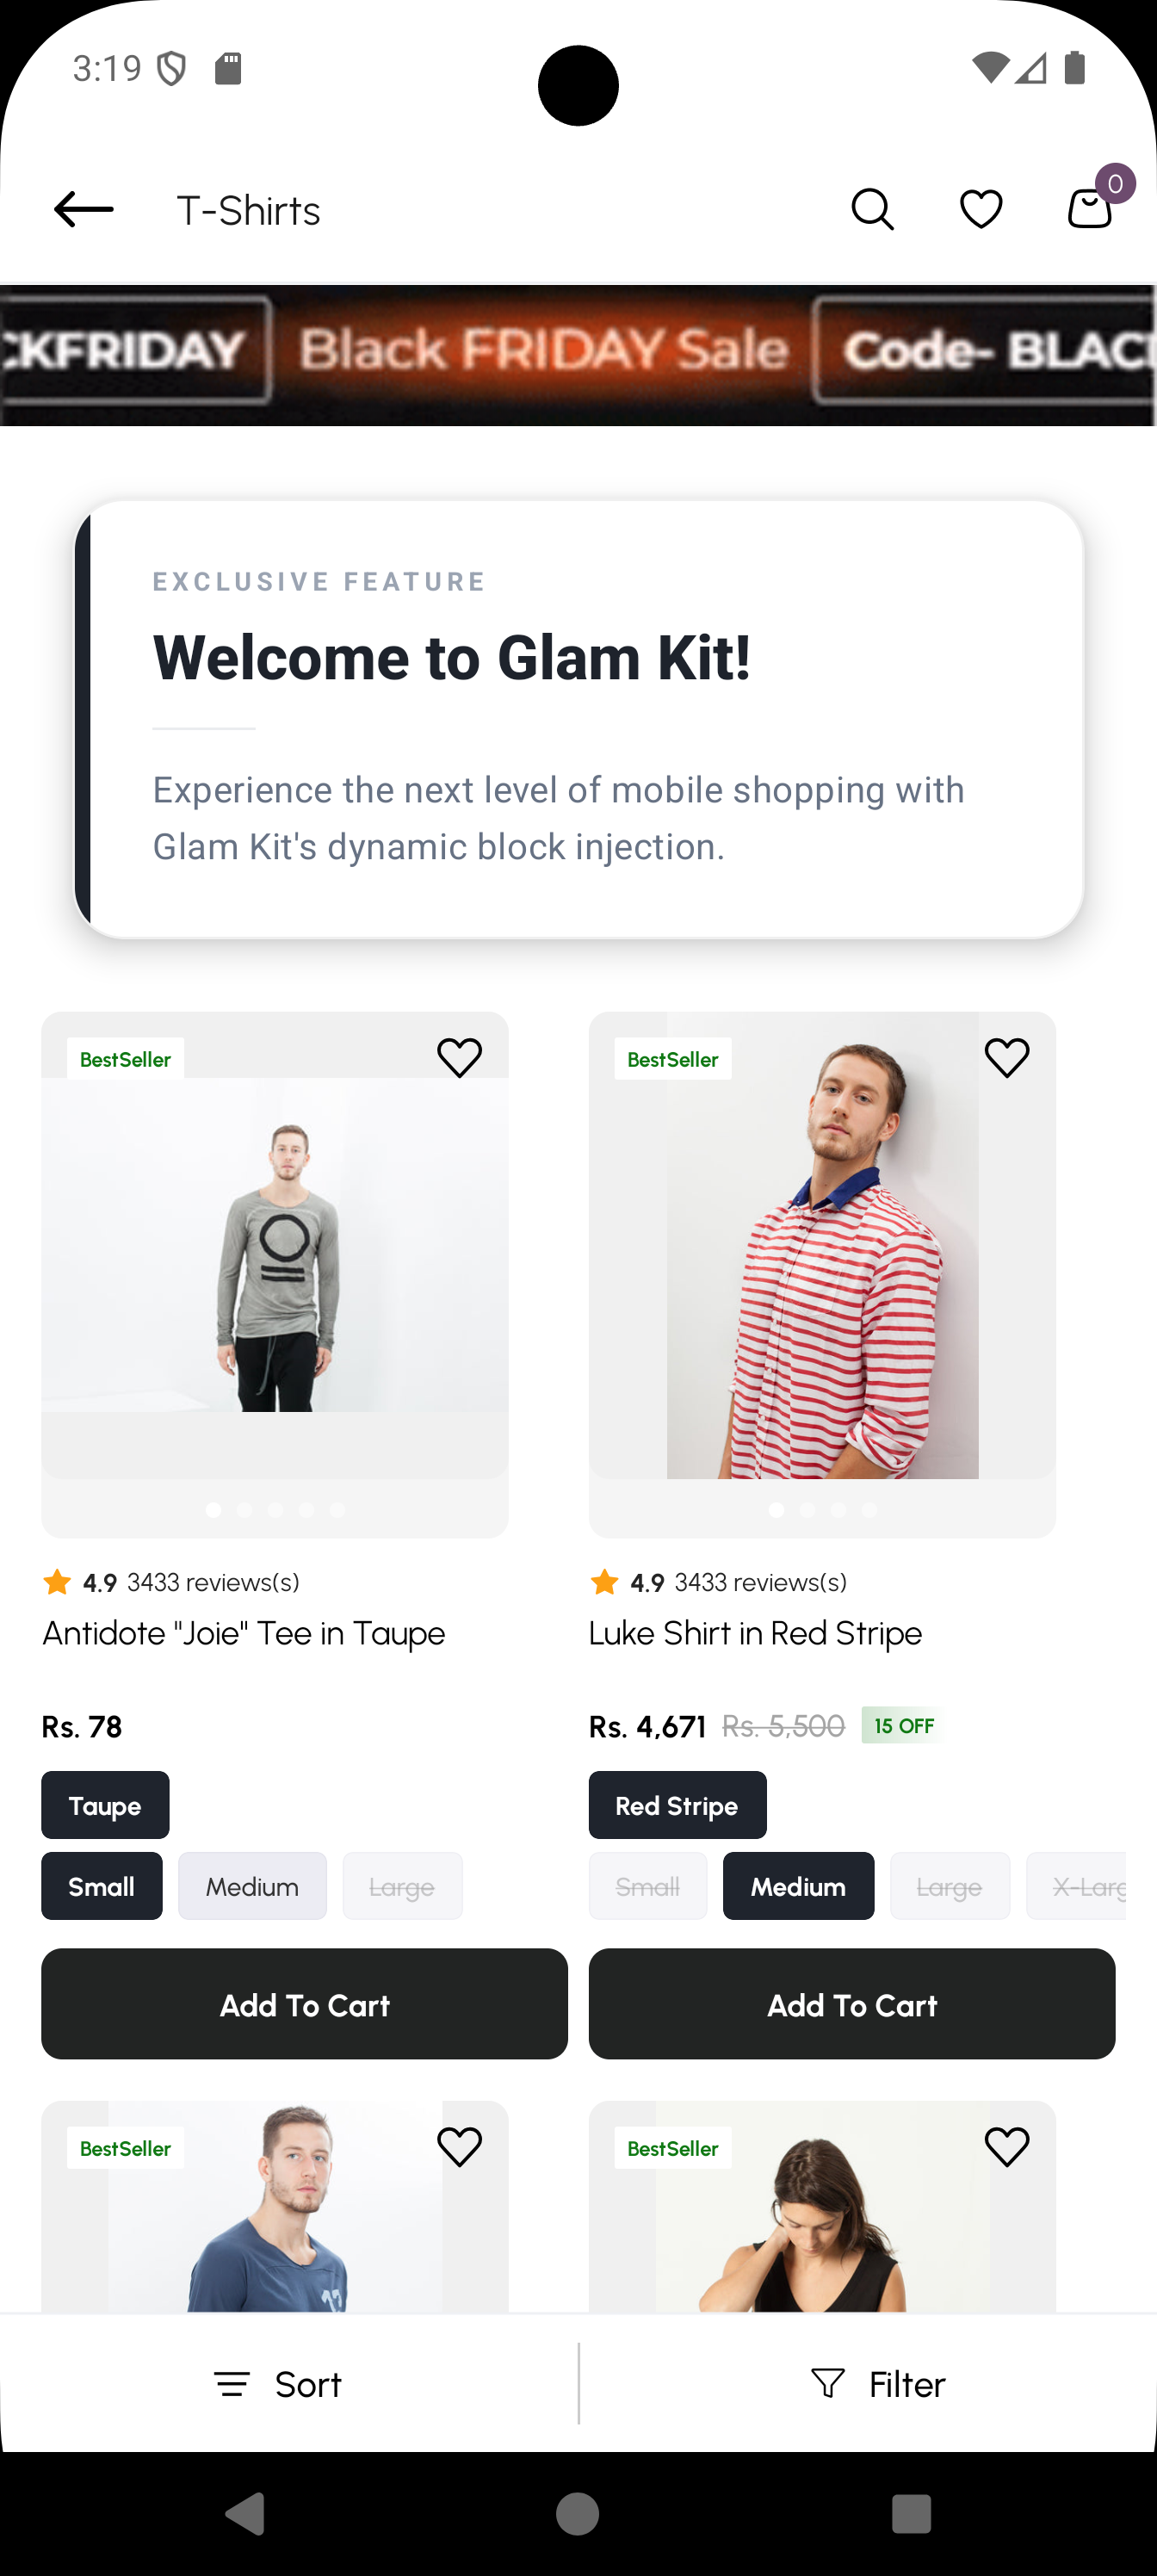
4. Visual Result
Once injected, your custom block will appear dynamically in the specified position. For example, injecting a banner at index 0 on the productList page:
5. Common Page IDs
| Page ID | Description |
|---|---|
home | The main dashboard/home page. |
productList | Any Collection/Category listing page. |
productDetail | Individual product information page. |
searchPage | The search results page. |
cartPageCheckout | The shopping cart/basket page. |
For a complete list of all available page IDs, refer to the Default Page IDs documentation.
6. Tips & Troubleshooting
- Debugging: If your block doesn't appear, add
console.log('Page Data:', data)inside the filter to see the current structure. - Positioning: Use
.unshift(block)for the top,.push(block)for the bottom, or.splice(index, 0, block)for a specific position. - Sticky Areas: Check
data.stickyHeaderordata.stickyFooterif you want the block to stay fixed while scrolling. - Attributes: You can pass any data to your block via the
attributesobject; it will be available as a prop in your React component.