Enabling Custom Blocks in App Builder
This guide explains how to register your existing custom blocks on the Appmaker Partner Dashboard so they appear in the App Builder for drag-and-drop customization on custom pages.
Overview
If you have already created a custom block in your theme or extension and confirmed it works in your app (e.g., via hardcoded schemas), the next step is to make it available in the App Builder.
By registering the block on the dashboard, you allow non-technical users to:
- Find your block in the App Builder sidebar.
- Drag and drop it onto any custom page.
- Configure its attributes (title, images, colors, etc.) without touching code.
Prerequisites
Before starting, ensure:
- The block is already implemented in your React Native code.
- The block is registered in the
blockStore(e.g.,packages-dev/theme-*/src/blocks/index.js). - You have confirmed the block renders correctly in your local development build.
Registering the Block on Partner Dashboard
Follow these steps to link your code-resident block to the Console Dashboard.
Step 1: Access the Blocks Section
- Log in to the Appmaker Partner Dashboard.
- Select Blocks from the sidebar menu.
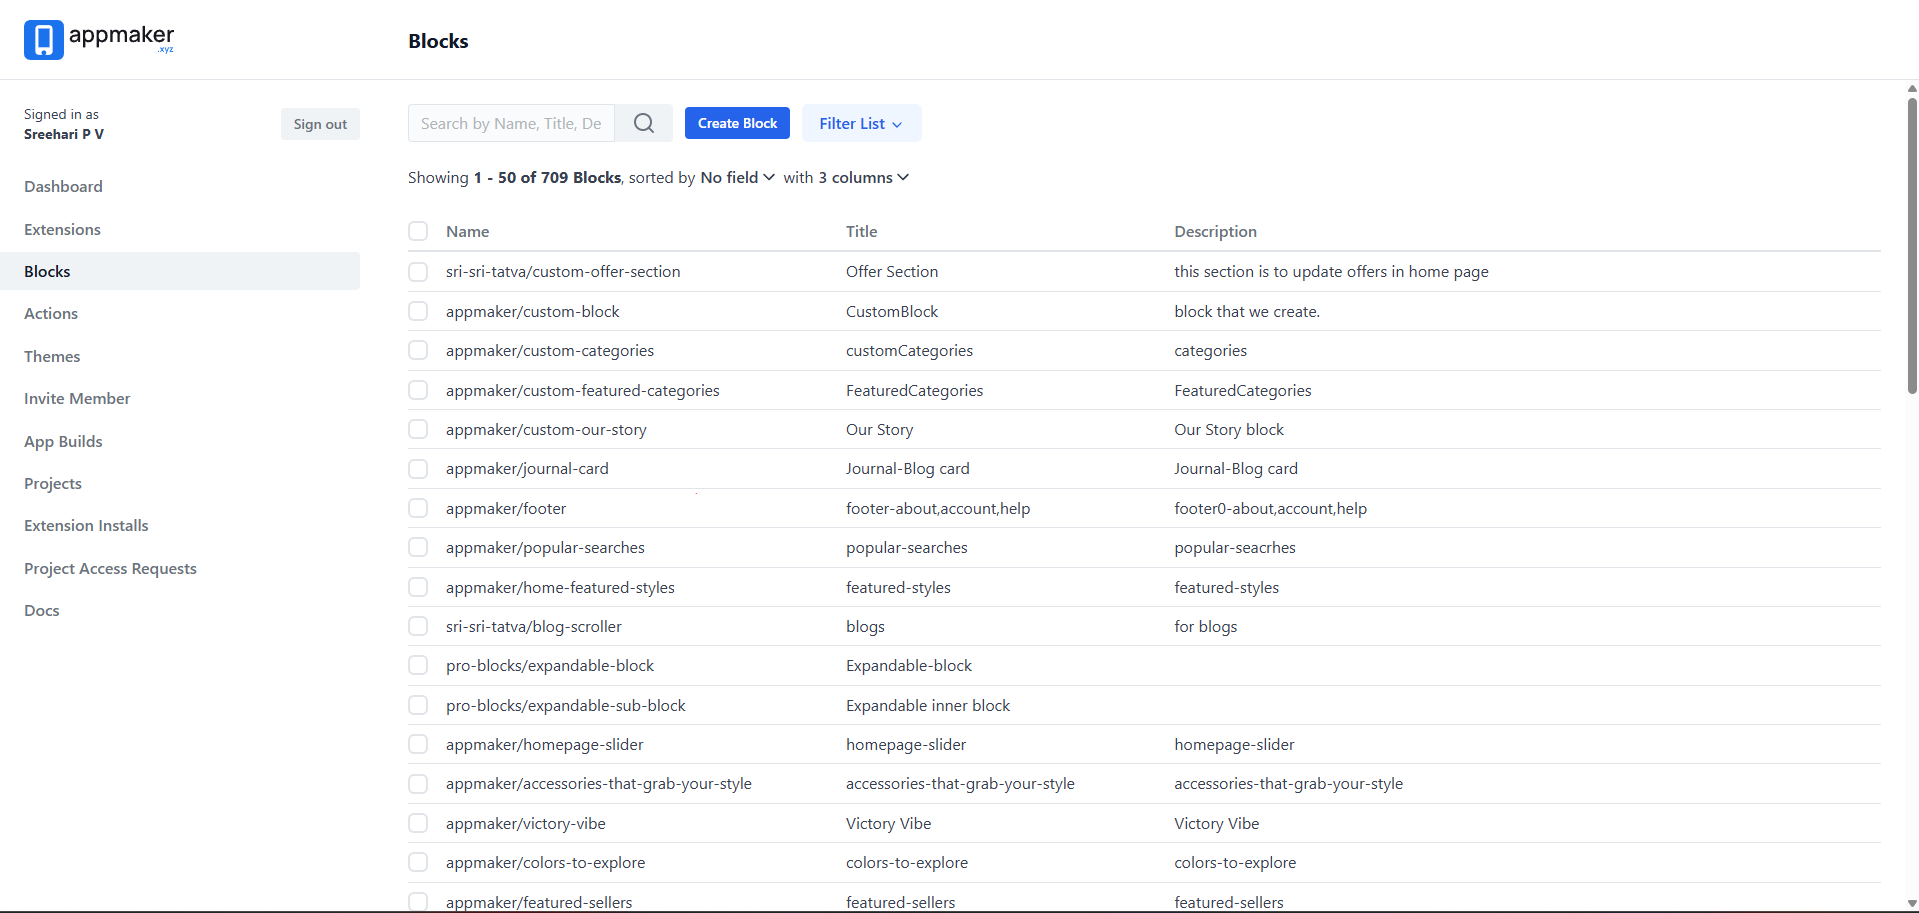
Step 2: Create a New Block Definition
- Click the Create Block button.
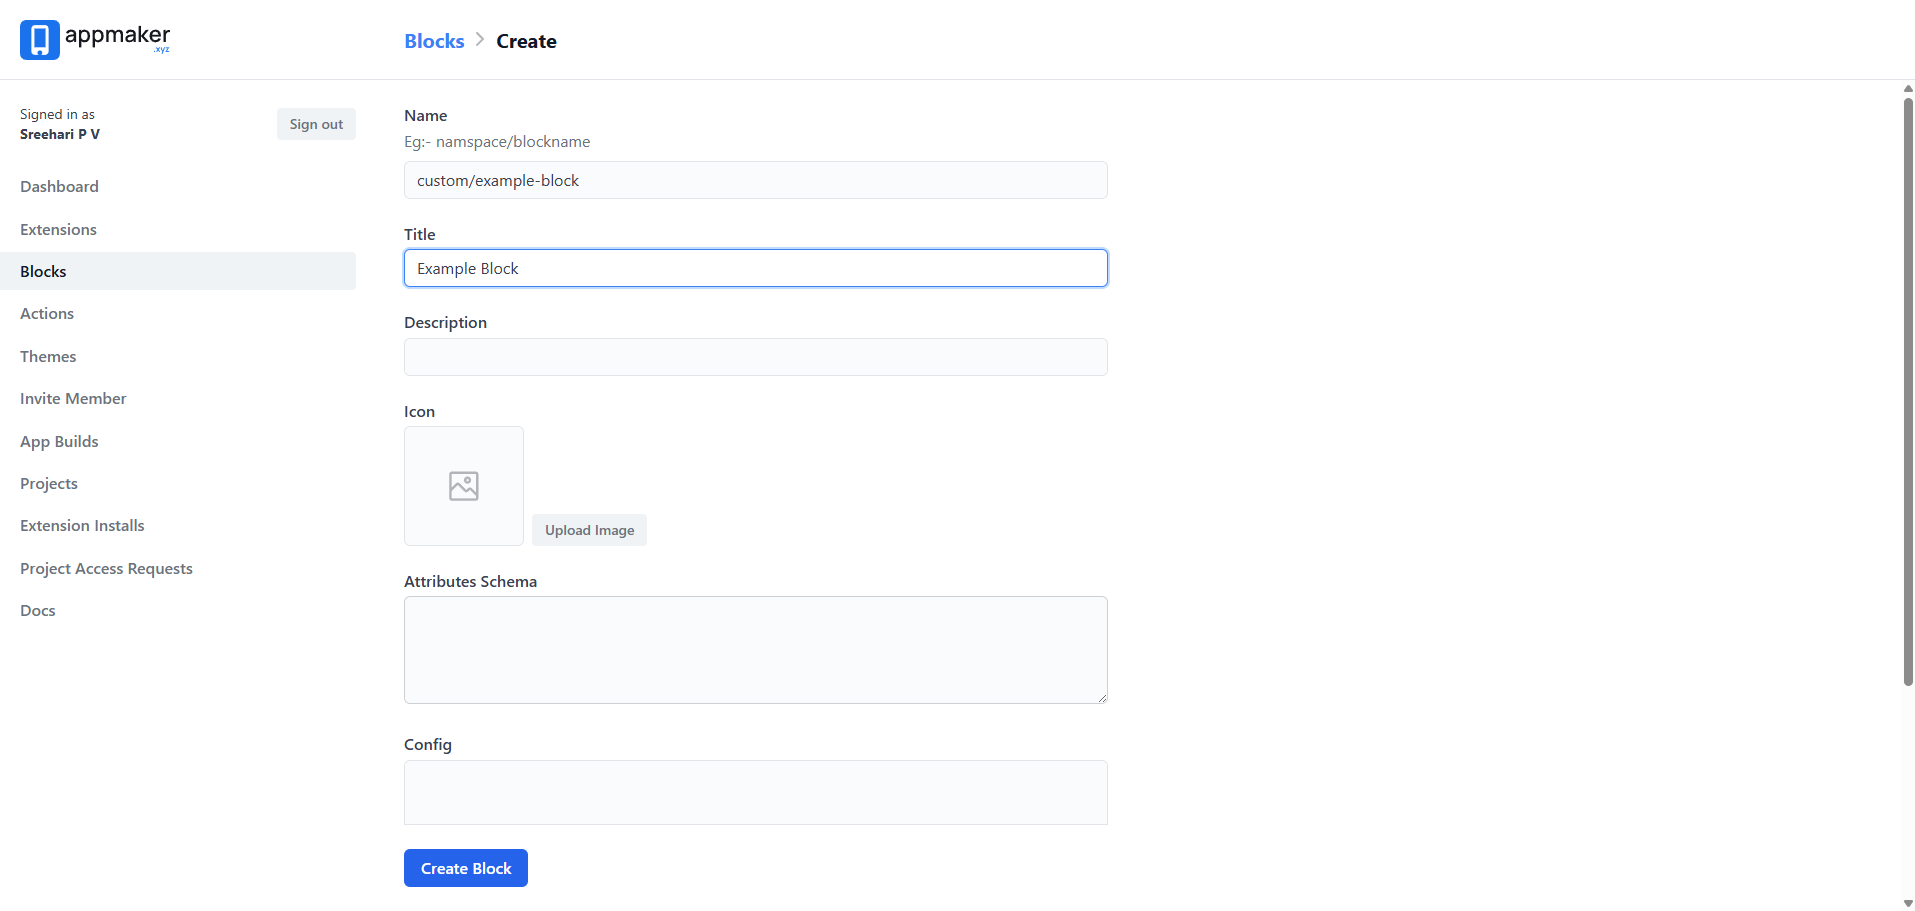
- Fill in the following metadata:
| Field | Description |
|---|---|
| Name | CRITICAL: Use the exact kebab-case name used in your blockStore registration (e.g., my-custom-banner). |
| Title | The display name shown to users in the App Builder sidebar. |
| Description | A brief explanation of what the block does. |
| Icon | An icon to help identify the block in the dashboard list. |
| Attributes | Define the schema for properties you want to be editable in the dashboard (JSON format). |
IMPORTANT: Block names MUST be in
kebab-case. Using PascalCase or camelCase may prevent the block from appearing in the App Builder.
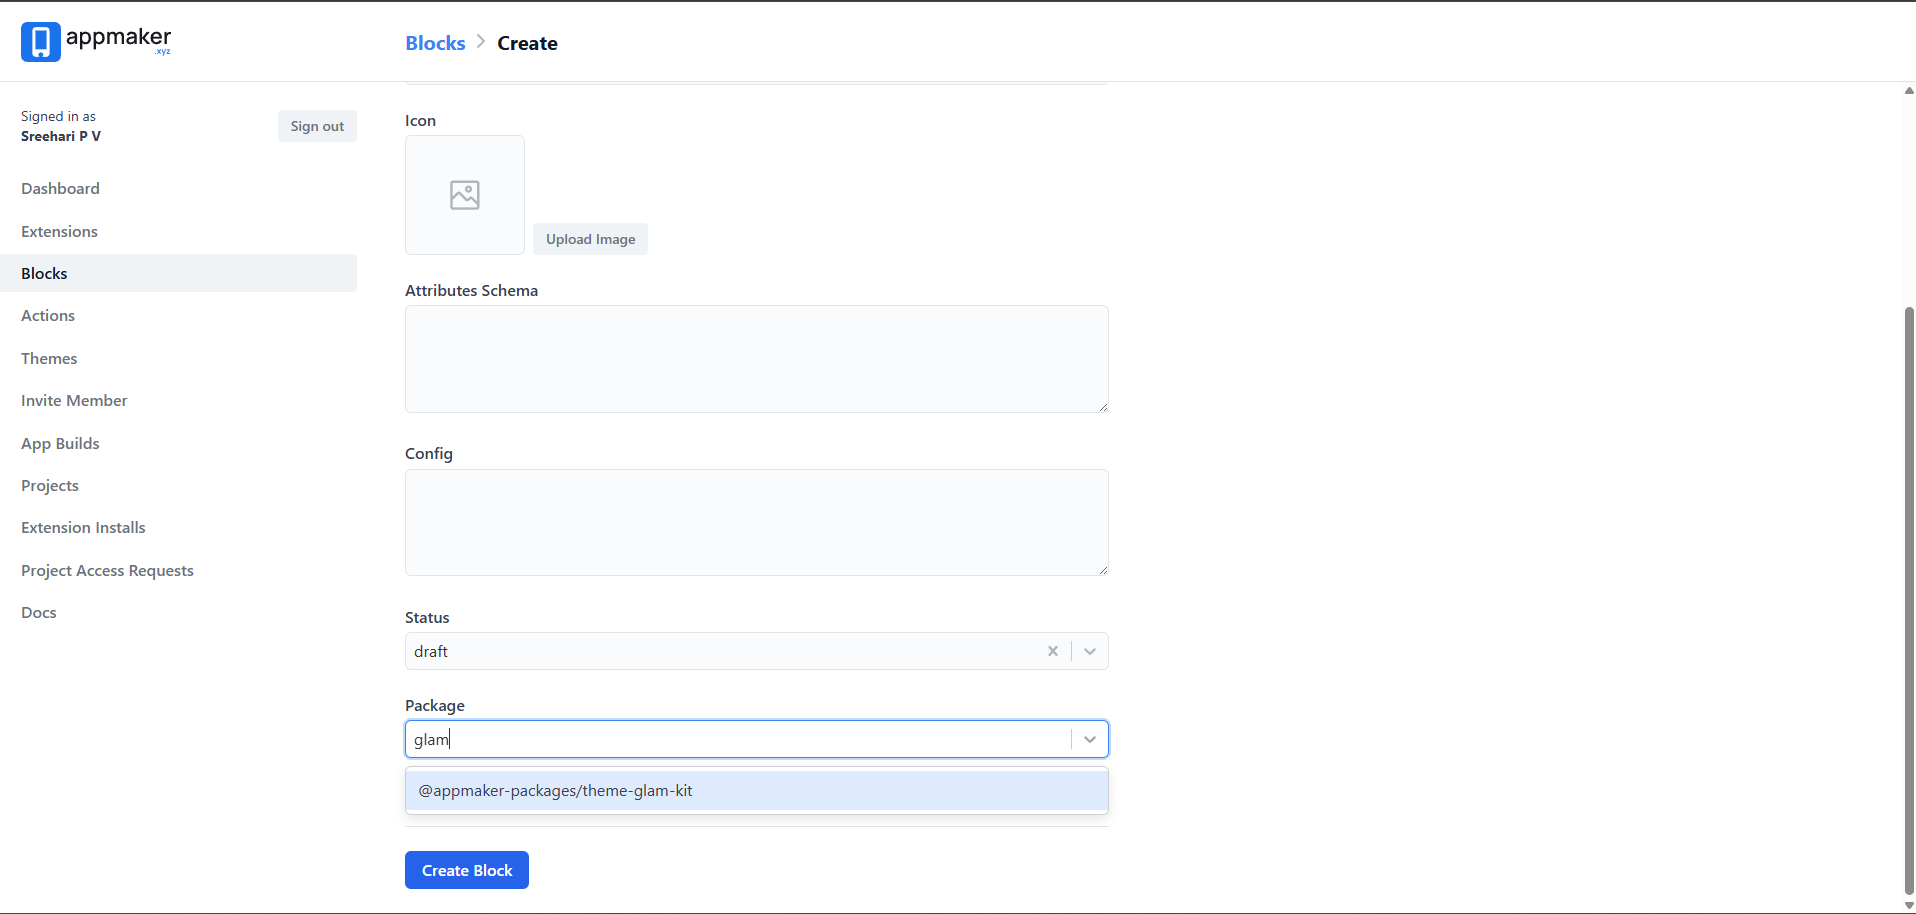
Step 3: Select the Target Package
- In the Package dropdown, select the package where your block code lives (e.g.,
@appmaker-packages/theme-glam-kit). - This ensures the dashboard knows which theme/extension provides the implementation for this block.
Using the Block in App Builder
Once registered, your block will appear in the App Builder for the selected project.
- Navigate to App Builder.
- Open or create a Custom Page (e.g., Home page).
- Search for your block's Title in the blocks sidebar.
- Drag the block onto your page.
- Configure the block attributes using the settings panel on the right.

Important Notes:
- Preview: Custom blocks do not show a live preview in the App Builder interface. You will see a placeholder.
- Verification: To see the block in action with its dashboard configurations, you must open the custom page within your Development Build or a Release Build.
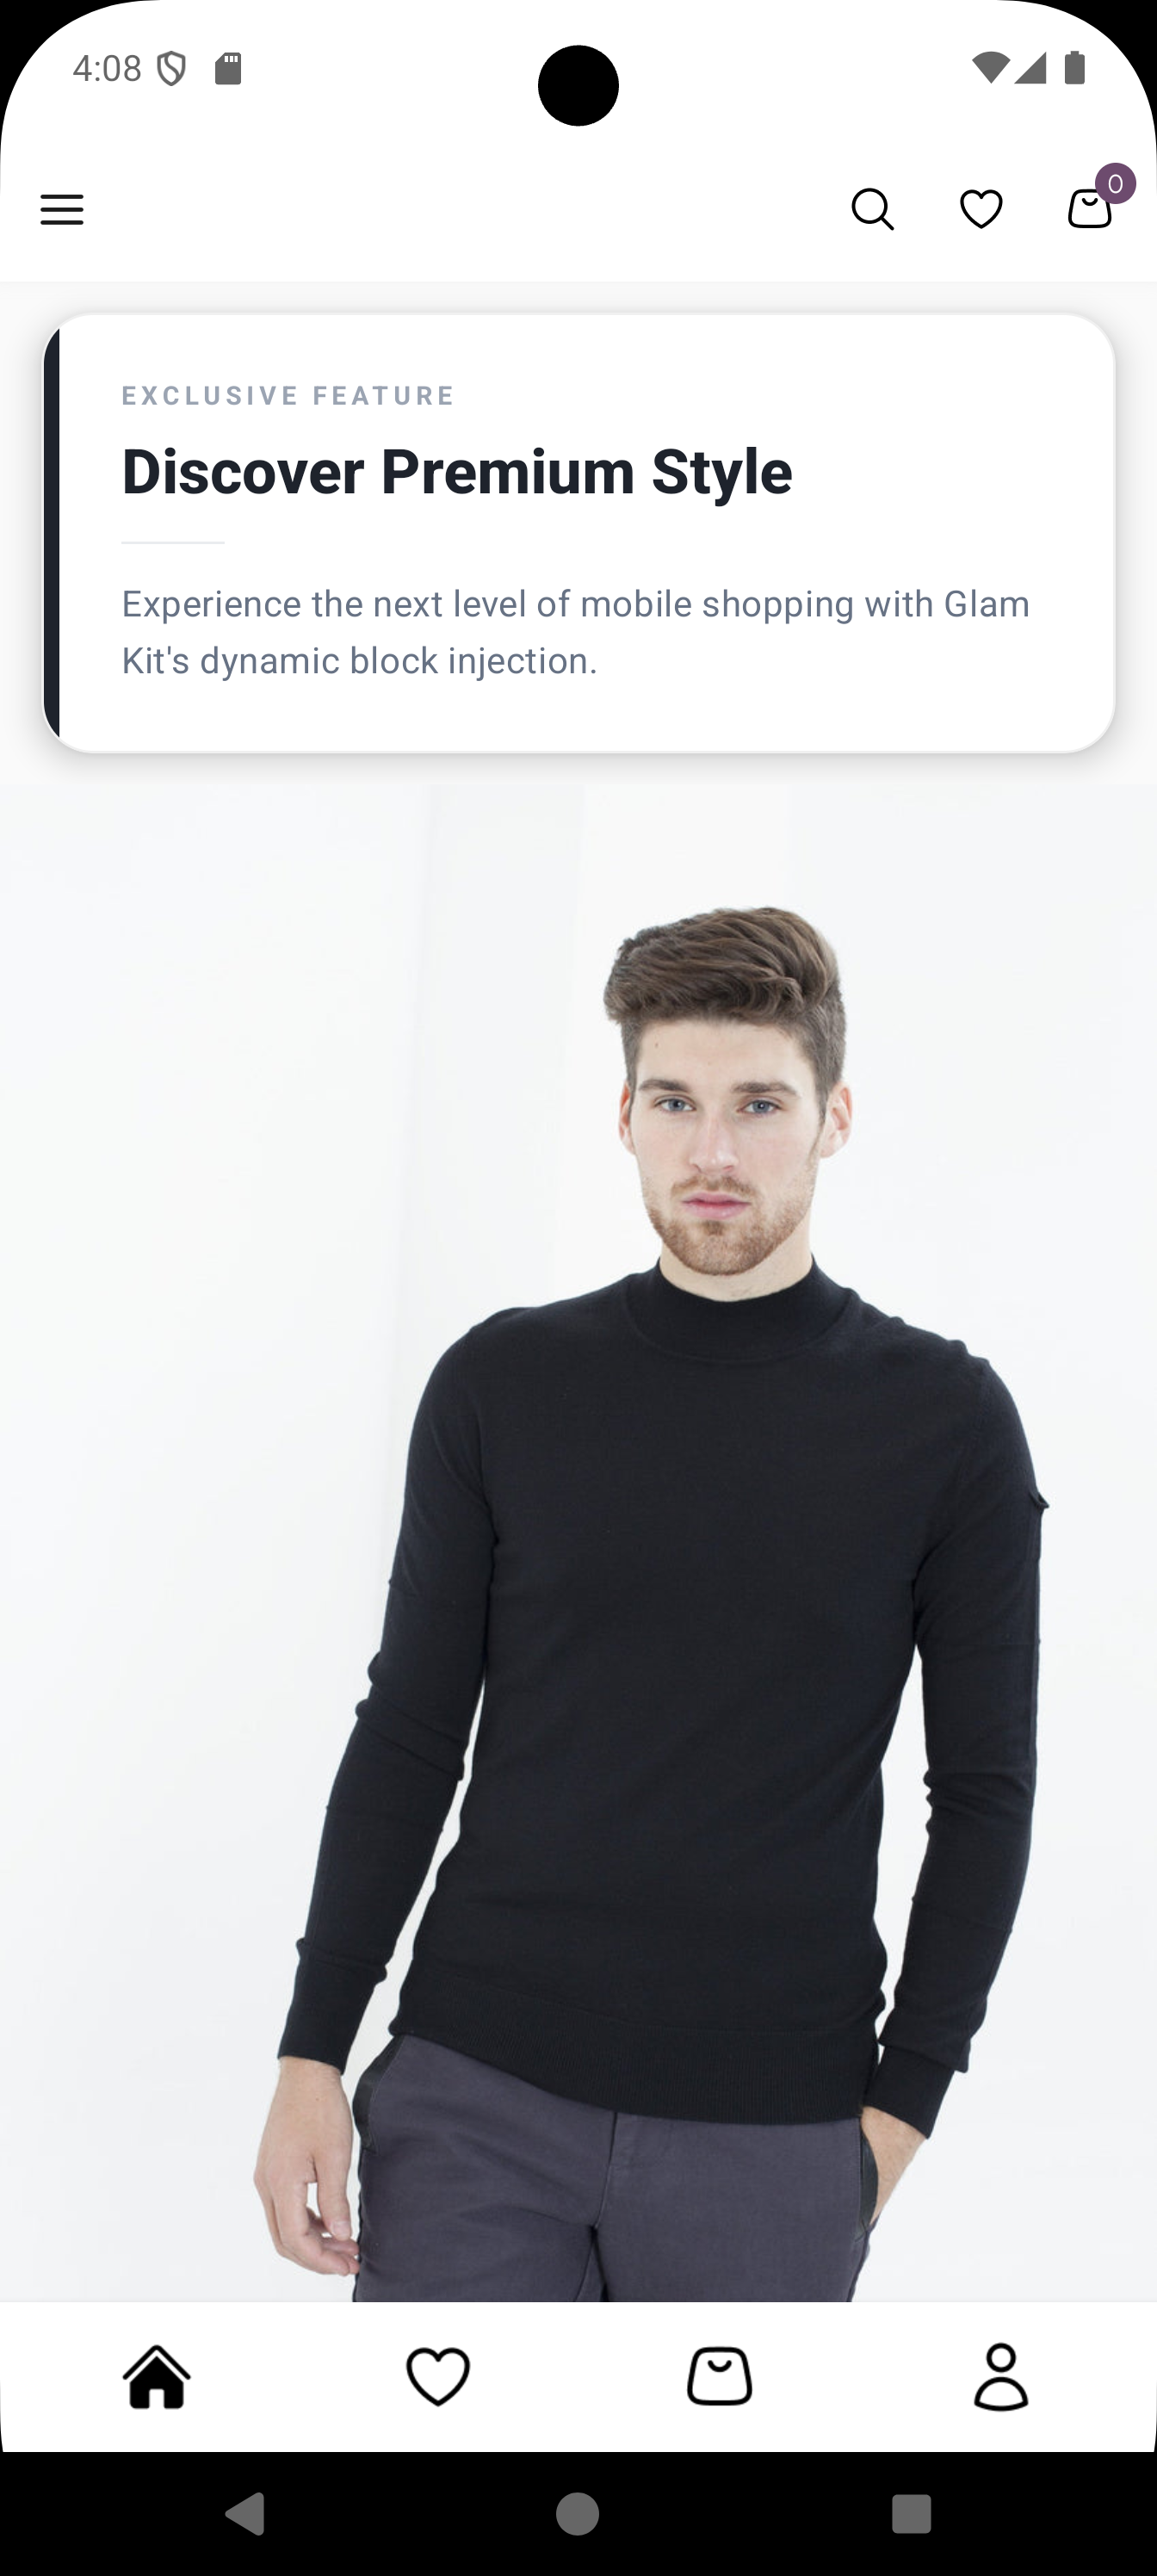
Viewing the Block in Mobile App
After adding the block to a page in App Builder, verify it renders correctly in your mobile app.
- Open your Development Build or Release Build.
- Navigate to the page where you added the block (e.g., Home page).
- The block will render with the attributes configured in the App Builder.
Troubleshooting
If your block does not appear:
- Case Sensitivity: Ensure the Name on the dashboard matches the registration key in your code exactly, and that it is in kebab-case.
- Package Mismatch: Verify that the block is registered under the same package you selected in the dashboard.
- Publish Status: Ensure the block definition is Published and not just saved as a draft.